



This post contains some affiliate links, which means that if you click on one of the product links, I’ll could receive commission.
For a while now I’ve really been missing getting together with crafty friends and had been wanting start up again. My thoughts were that I could host it in my new craft room but alas that is much to messy still and I couldn’t really fit many friends in there. So I put the idea on the back burner and let life move forward. My sister introduced me a few months ago to Bible Journaling. When I checked out the photos of what people are doing I was so impressed and knew that is exactly what I had been wanting to do. It turns out in the 3 fellowships in our branch there were some other believing ladies who were interested in the whole bible journaling idea and were interested in getting together. So far our group has met twice and and have been so inspired and have done a few entries outside of our meetups. We are meeting at a local coffee shop here in Duluth called Espresso Theory I really love getting out of the house and meeting new people and being in an environment that is easy to spread out and work on our works of heART.


Here are some of my pages I’ve done, along with pictures of others in our groups pages.
I thought I’d put together a little bit of a list of what we’ve been using and how one might need to get started, as well as links to resources available online.
I’m not an Artist? Can I do this?
YES!!! Yes you absolutely can. First off I am also far from an “artist” but I have found out some ways to get away around that.First is TRACING!!

Since there was nothing on the other side of my page I was able to just stick my printed lettering and patterns under my page where the blank is and trace it using my markers i bought. (Linda traced an image right off her phone!!! like a portable light box). I am going to try and use my Ipad to trace off of next time. A cool thing about my print out is that mom was able to trace it to her page next, so bonus of multiple uses!! You could also print off images from the internet or use coloring books or other art books to trace from.
Another option is STICKERS!
I’ve actually designed a couple layouts that fit in the margins and printed them out on sticker paper then cut them out to fit right in my bible. My comfort zone is definitely on the computer designing and this lets me incorporate that into my bible journaling.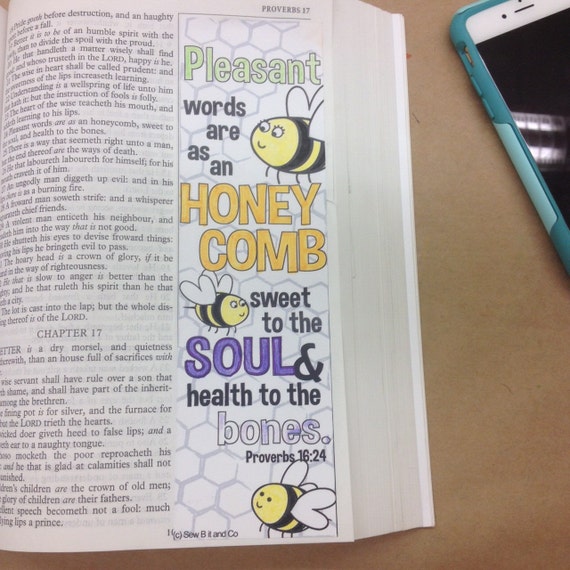
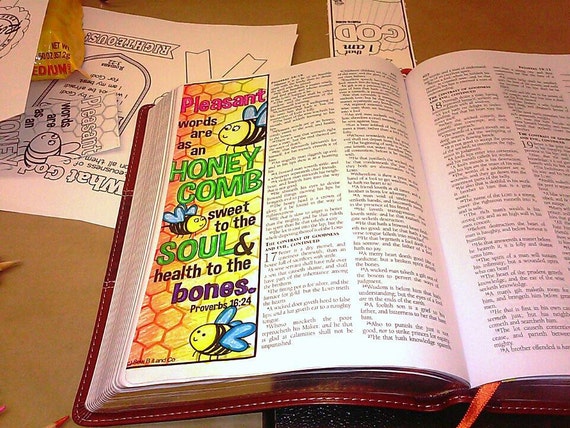
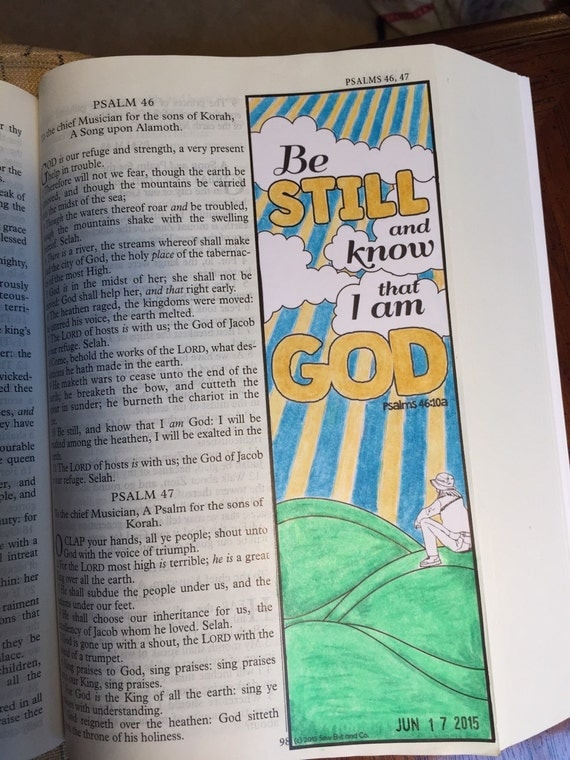


I have some of these designs available in my etsy shop right now.
Freehand
If you are an artist, doodler, enjoy creative lettering you can easily take all the mediums and methods you currently do your art in and apply them to your bible. There are some amazing artists out there doing lots of great work free hand. My friends Beth & Fran do amazing freehand work.


Mixed Media
In this page I did I used a bunch of different media. Washi tape, cardstock, clear paper, and markers. For me I still like to be able to read all the text in my bible so for the flowers and the clouds I actually doodled and colored on white cardstock and then glued them in at just one point so I could bend them back or to the side and read the text. I also allowed parts of it to go outside the page kind of like a tab when my bible is closed. You could easily add layers of ephemera, stamps, stickers, tapes, paints etc on one page really layering the look. Again there are many examples of mixed media styled pages when you do an image search of bible journaling.
Bible
You can use any bible you might have on hand or you could invest a little bit of money (approx $10+). A bible with a super wide outside margin works really well for bible journaling, especially if you don’t want to cover up any text with your art. When looking, you might find them called Note Taker or Journal Bibles.My Recommendations:
The bible that checked all the items on my list is: the Mid Size Note Taker Black Vinyl by Local Church Bible Publishers. I really like the 2.5” side margins as well as the large print. It does make for a thicker bible but that works just fine for me. I also love that it is KJV (my preferred version) as well as the price point as a group we ordered a case and with shipping it worked out to be about $13/bible

Things you might want to keep in mind:
The bigger the margins, either the text gets smaller or the bible gets larger.
Paper thickness, thinner papers more bleed through or ghosting.
Do you want to be able to read and use the bible regularly
Art Supplies
Much of what you already have will work in your bible. People are using colored pencils, paints, markers, stamps, watercolors, washi tape, and more.My Recommendations:
Here are some product either I have used or friends in my group have/are using:


Things you might want to keep in mind:
Markers and inks may bleed through but there are page primers that will help block bleed through. Colored pencils of any quality are producing amazing art in bibles.
More Online Resources, Tips, Tutorials and more!
A bunch of people are sharing their processes and tutorials via Youtube. I even have a video of how I use my tool caddy for to store my bible journaling supplies.
Someone also started a group for kids here. I have a bible journaling group on facebook called Bible Journaling Down South you're welcome to join.
If you enjoy searching pinterest for inspiration my sister and I have a great pinterest board:

For the last 7 years my son and I have been hosting an ornament swap. The catch is we don't buy our ornaments we make them! Really it is an excuse to have some fun crafting time with my kids. Over the years we've worked out a few kinks and now we make about 20 ornaments each year for those who want to swap with us.
This year's ornament has been in my head since last year. I had a bunch of poster tubes that I've collected hoarded over the years and they all had 2 end caps in each one. I really wanted to actually use all the things I've been saving and these caps were on my list. I had an idea to make them into little shakers or snowglobe type things. I figured out a way that used a bunch of my craft supply stash and turned out super cute ornaments.


Here are the supplies I used: poster tube caps, transparency sheets, foam stickers, ribbon, washi tape, hot glue, and sequins (all of which I had in my stash o' stuff)

Use the stickers to make a scene on the inside of the poster tube cap, then add your sequins, glitter, or beads. This is the easy and fun part. My kids loved sticking the stickers and picking just the right ones for their friends.

This is the tricky part. I had a thin rim on the tube cap that I had to run a bead of hot glue along. This is NOT the part to have the kids do. Once you've got your glue move quickly to add a square of transparency film over top of the cap. Use a book to hold the film down so it is flat. You will want to make sure you get glue around the whole edge so when you add the transparency film it will seal the sequins and loose pieces in. The glue doesn't have to look perfect you will cover the glue with the washi tape.

I flipped over the cap and used my scissors to trim away the extra transparency film. Note make sure your glue is cooled before you flip it over or shake it, if you don't your sequins will stick to the edge.
Next up wrapping the edge with a strip of washi tape. The washi tape that I used was a bit thicker and tackier than another roll that I had tried. This kind stuck really well. I covered about half way on the side then folded it over. The tape makes a nice little frame for your shaker.

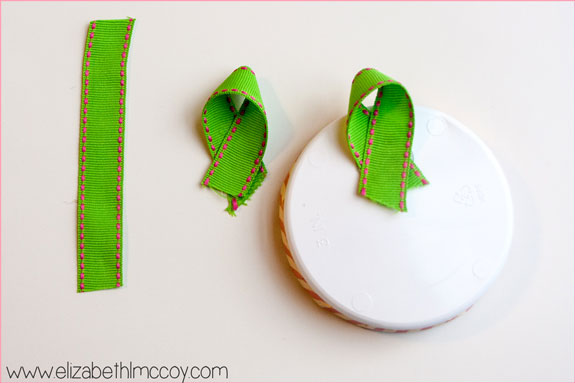
Last step is to add a hanger on the back. I used ribbon folded over and glued onto the back. Pretty simple and easy.


Well lookie here two crafty posts in one week! I've still not finished dressing up my front porch but I did want to get a wreath up rather quickly. I also didn't want to spend any money. This wreath accomplished both those goals.


Fall is my favorite time to decorate the house, and my favorite time to be outside. This year I've been a little behind on my decorating efforts especially on the front porch. I got out some of my styrofoam pumpkins from the attic and found that some of them have chipping paint.


I've still got a few chippy pumpkins to deal with any suggestions on the next transformation???